Circles of Life: Final project presentation

Project title: “Circles of Life”

(click on thumbnails for a larger view)

00_dispenser_forblog

Before any cutting or gluing or tweaking, I had these plans to physically show for my project. The many circles cut into these pieces are one reason I named this project “Circles of Life.” Because the laser cutter in the shop can only cut up to 1/8th inch wood, some pieces had to be cut twice then sandwiched. Also, because the plywood was ever so slightly warped, some pieces had to be run over a second, and even in places a third time with the cutter. This resulted in more burning than normal near the edges, and is the reason why some pieces appear smeared with ash. Rather than try to hide this with the less burned sides facing out, I decided to make these burns part of my project.

OLYMPUS DIGITAL CAMERA

The two outer frame pieces were sandwiched so that minimal burning was shown, but the inner pieces, the wheel, hopper holder (hopper being the pot assembly that holds the bird seed), motor holder, and the frame that holds the wheel were sandwiched to show their more burned sides on the outside. The idea is that to represent growth in the circle of life, the outside may appear clean and orderly, where the inside is really dirty and chaotic. We watch a flower grow, and it generally follows a predictable pattern. Stem sprouts from the seed, flower reaches up to the sun, leaves and bud develop and bloom. I’m picturing one in my head right now. But inside the flower, in the processes that help this plant grow, those are the complicated ones. We can make artificial flowers that bear much resemblance to the real thing, when you don’t touch or look to closely, but we can’t grow flowers apart from their natural process. We can’t duplicate it. These burns are almost like fingerprints or the growth process—unique to these wood pieces and all but impossible to duplicate. And I definitely had time to think about all this while it was being cut. The laser cutter recuts at the same speed every time, regardless of how much was cut previously, or even if it’s cutting everything (not all parts needed the double do over). That means the normal 15ish minutes to cut one plywood board full of designs extended into the running time of your favorite TV show, sans commercials. Not all the cuts were like this, but enough.

OLYMPUS DIGITAL CAMERA

Next came the sandwiching of pieces, which required moisture on both gluing surfaces before the Gorilla Glue was applied, something about helping the curing process.

OLYMPUS DIGITAL CAMERA

When all pieces were glued and clamped, I let them sit for a few hours. Everything lined up very well, except for a few edges that required sanding and filing to even out due to the warped wood for cutting. But nothing a total of several minutes didn’t easily fix.

OLYMPUS DIGITAL CAMERA

The motor holder used the same process as the other pieces, sans clips. The main thing with the motor was to make sure none of the glue got on or seeped onto moving parts. No problems there, and I tested the rotation occasionally to ensure nothing moveable was being hardened.

OLYMPUS DIGITAL CAMERA

Here is an overall photo of my project before final gluing, just showing where everything would go. The biggest change between then and now that can be seen is the unfinished hopper.

OLYMPUS DIGITAL CAMERA

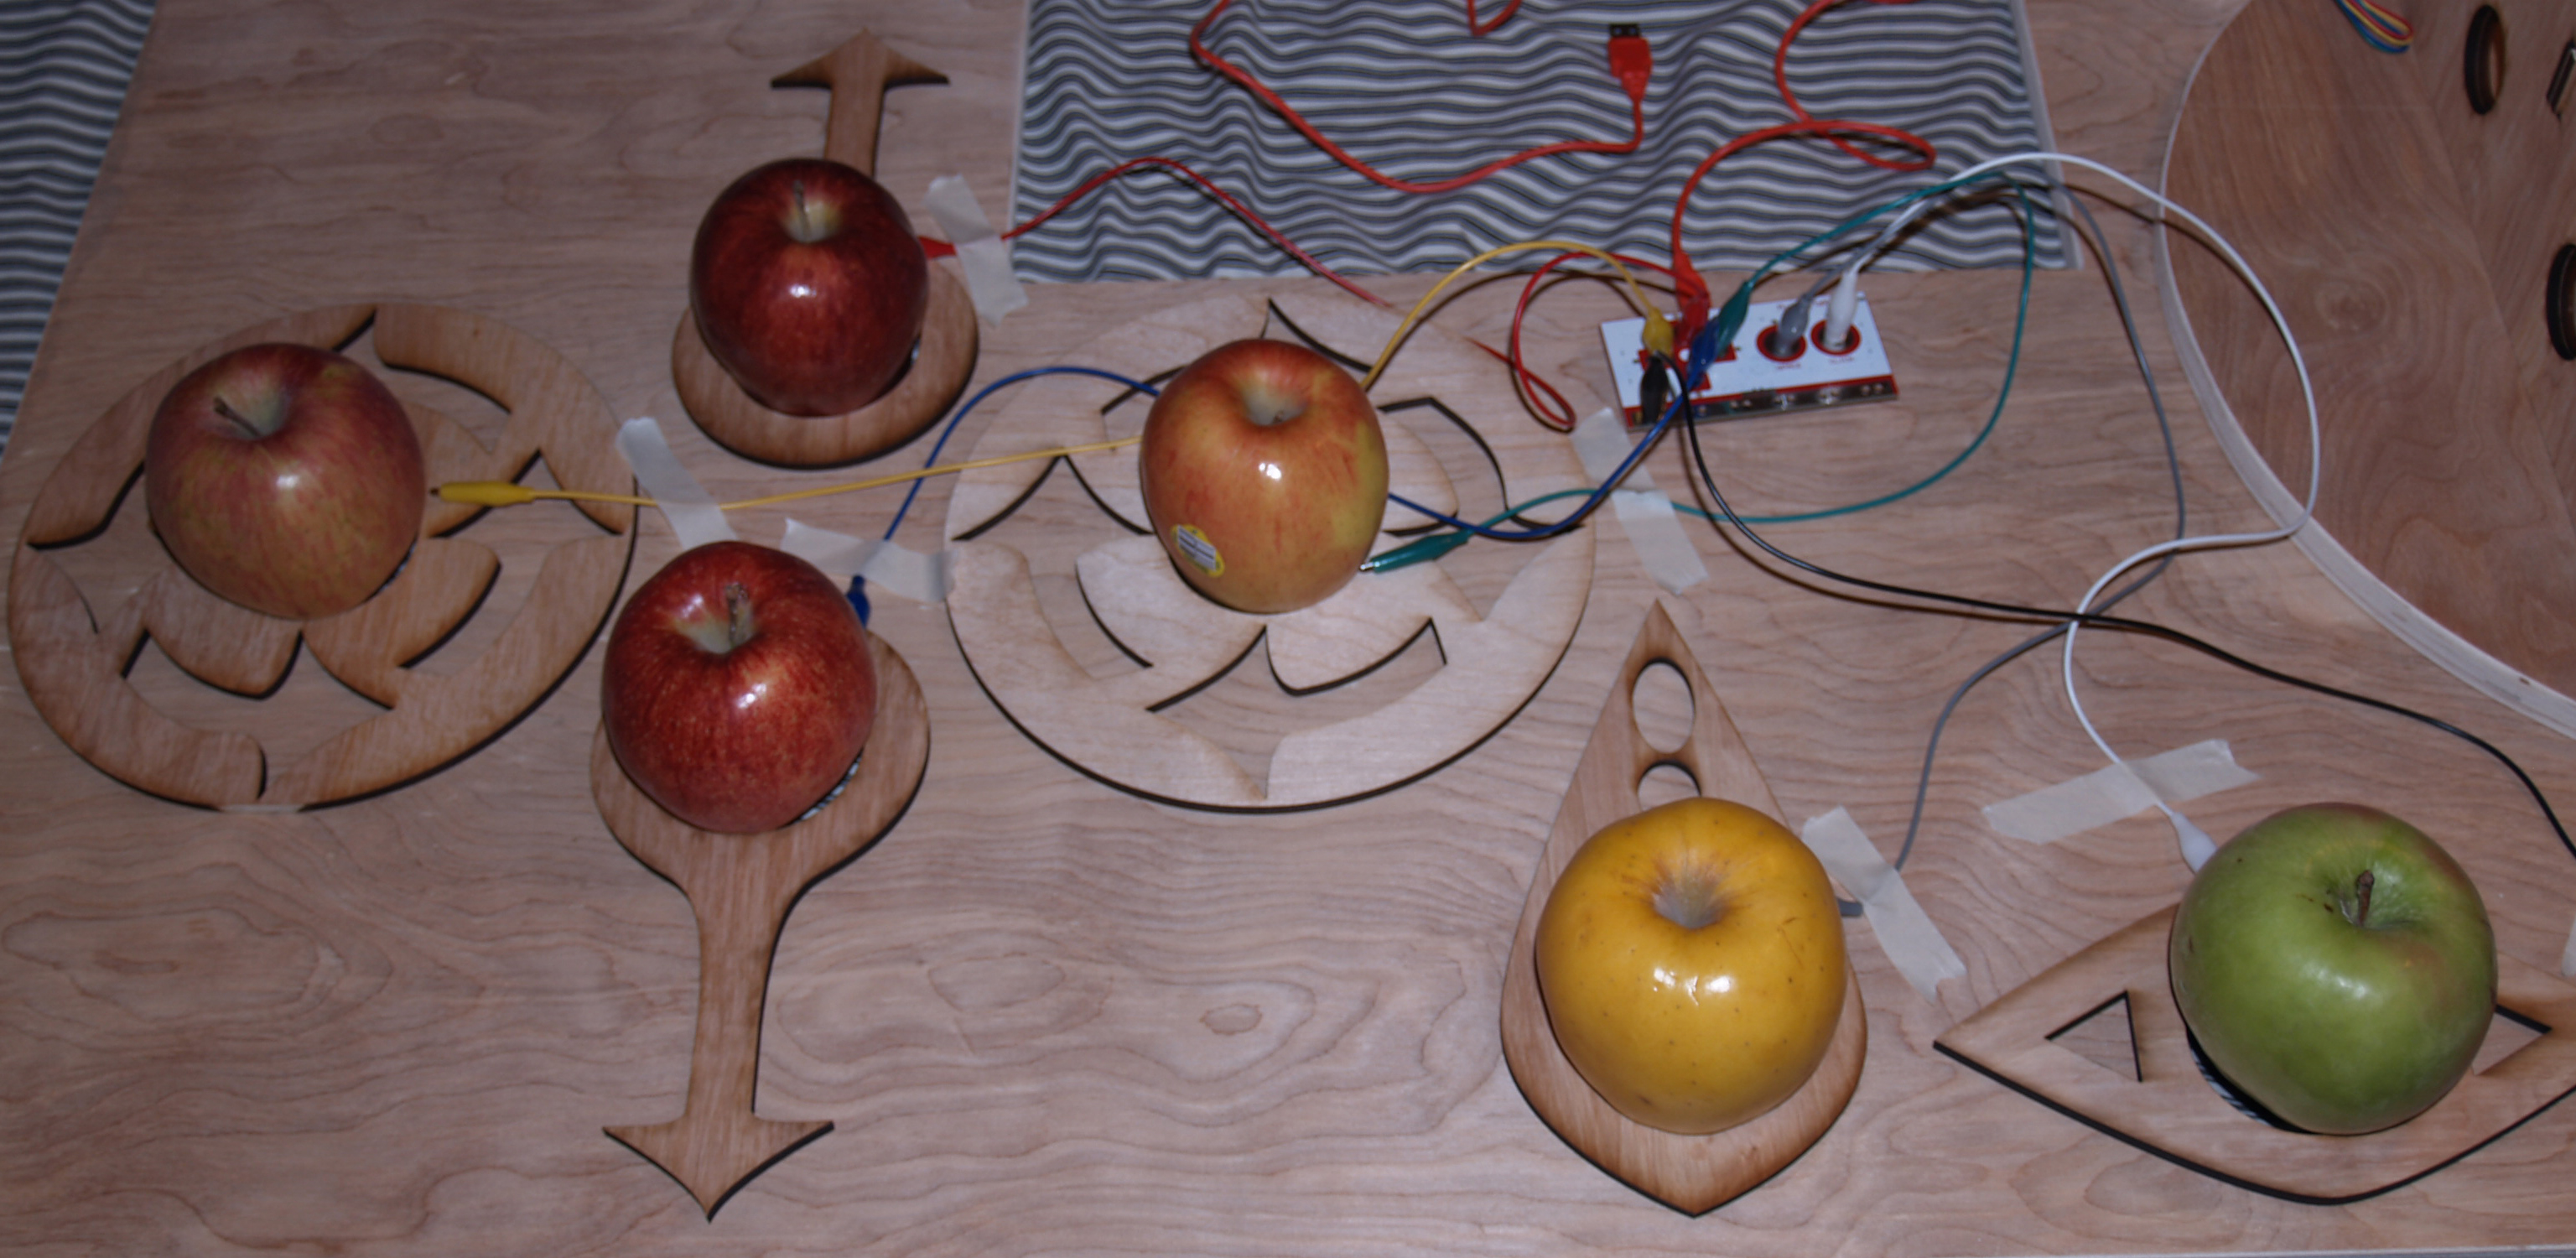
Here is a close up of the apple keyboard (my program runs on an apple computer…) with the Makey Makey circuit in the shot. The Makey Makey is a premade device that hooks up to a computer and fools the computer into thinking its inputs are regular keyboard keys.

OLYMPUS DIGITAL CAMERA

The Arduino wiring looks a bit messy, but it’s nothing too complicated. It’s basically the wiring from http://arduino.cc/en/Reference/StepperBipolarCircuit with a button added on the top for testing the motor earlier on.

OLYMPUS DIGITAL CAMERA

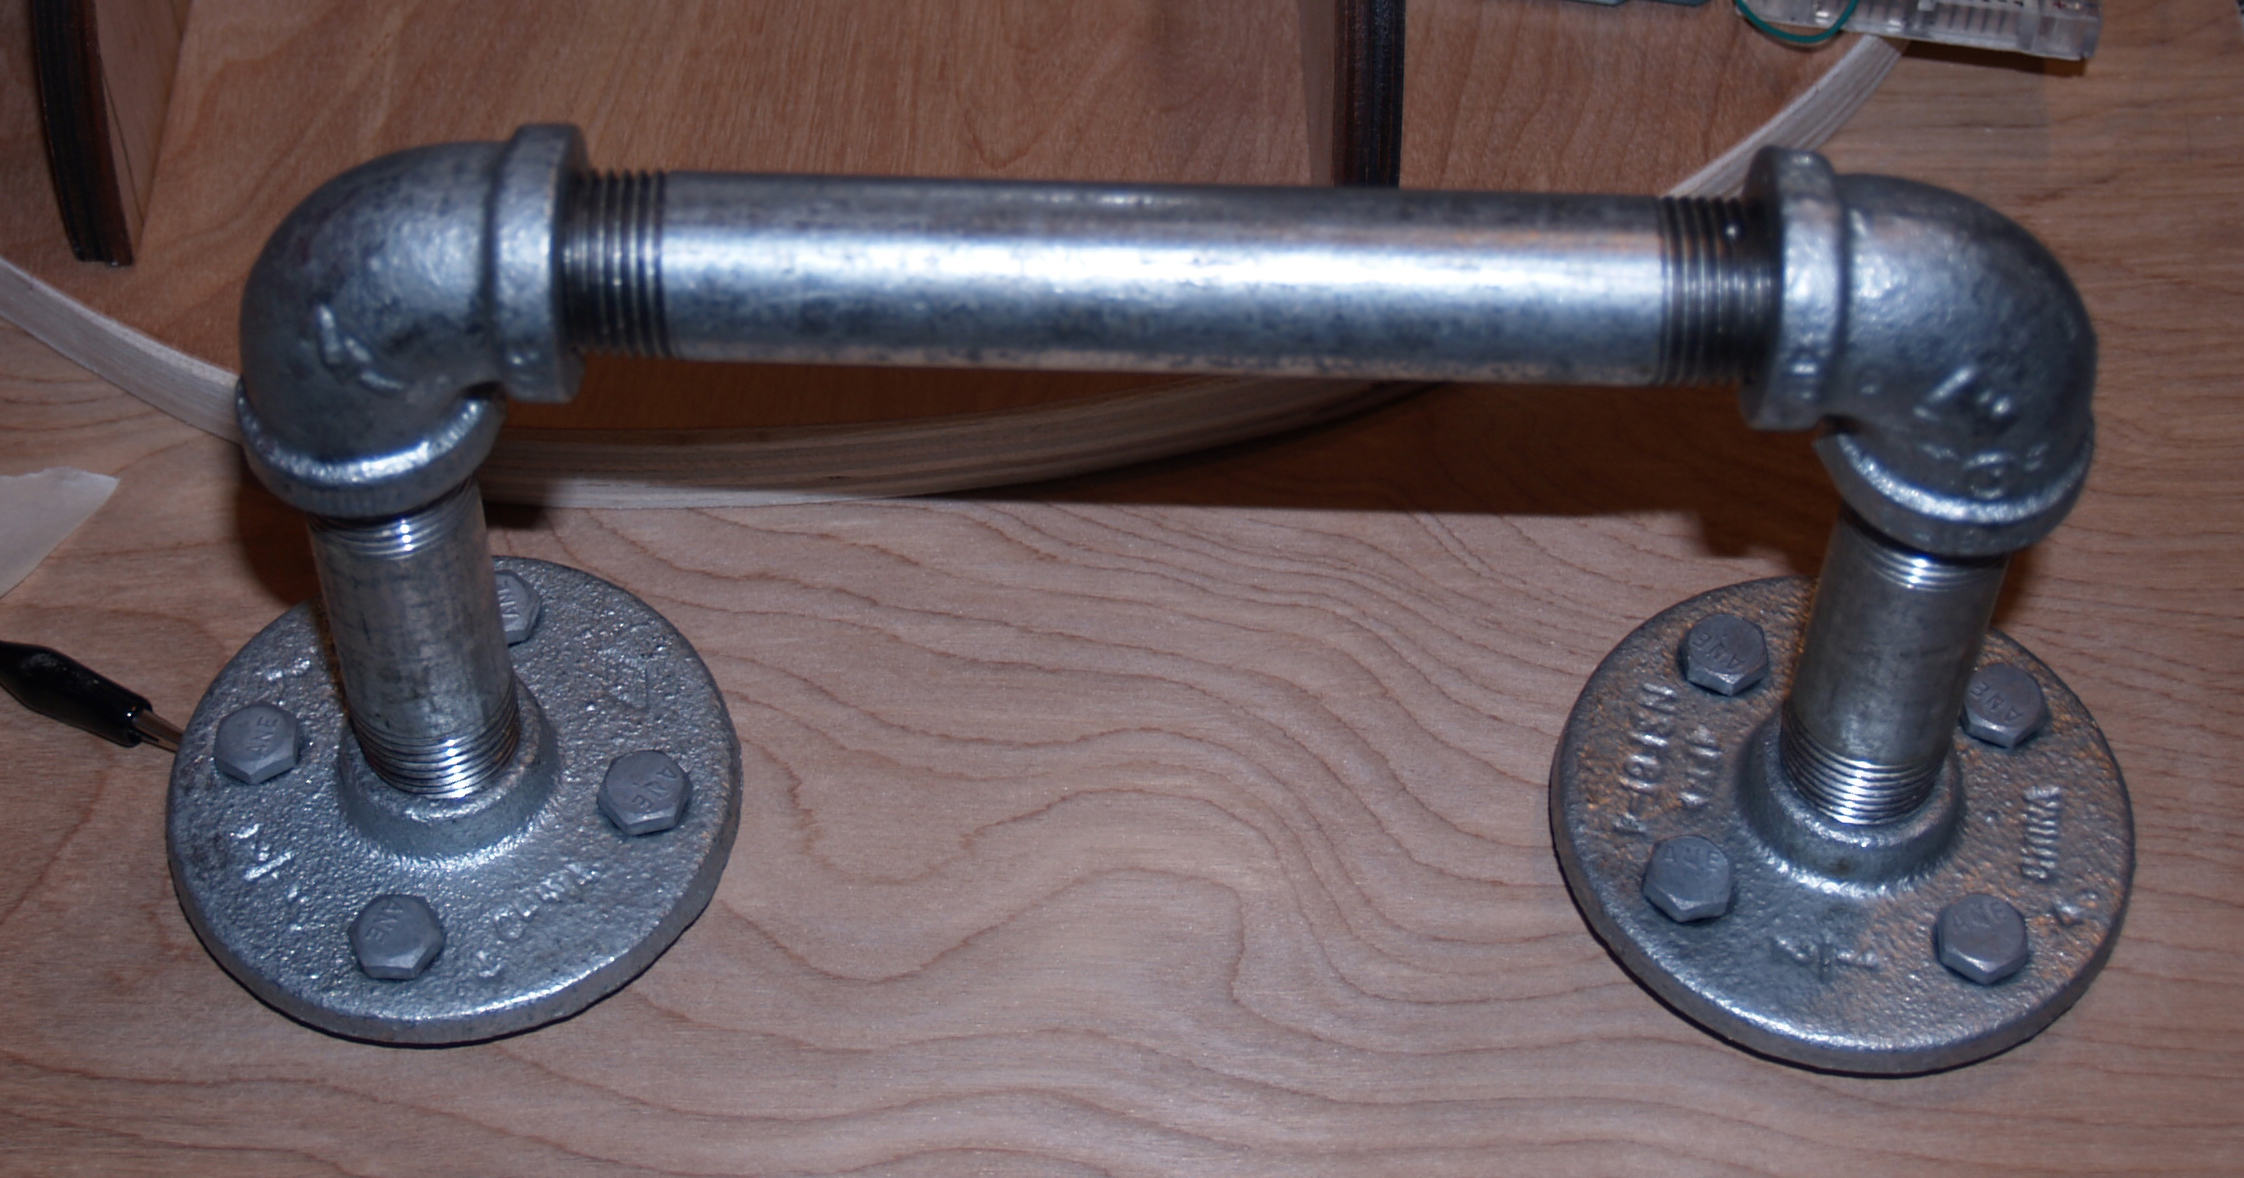
This is the ground for the Makey Makey, and the user must stay in contact with it while using the keyboard, to complete the circuit with the tiny bit of voltage the MM uses to determine key presses.

OLYMPUS DIGITAL CAMERA

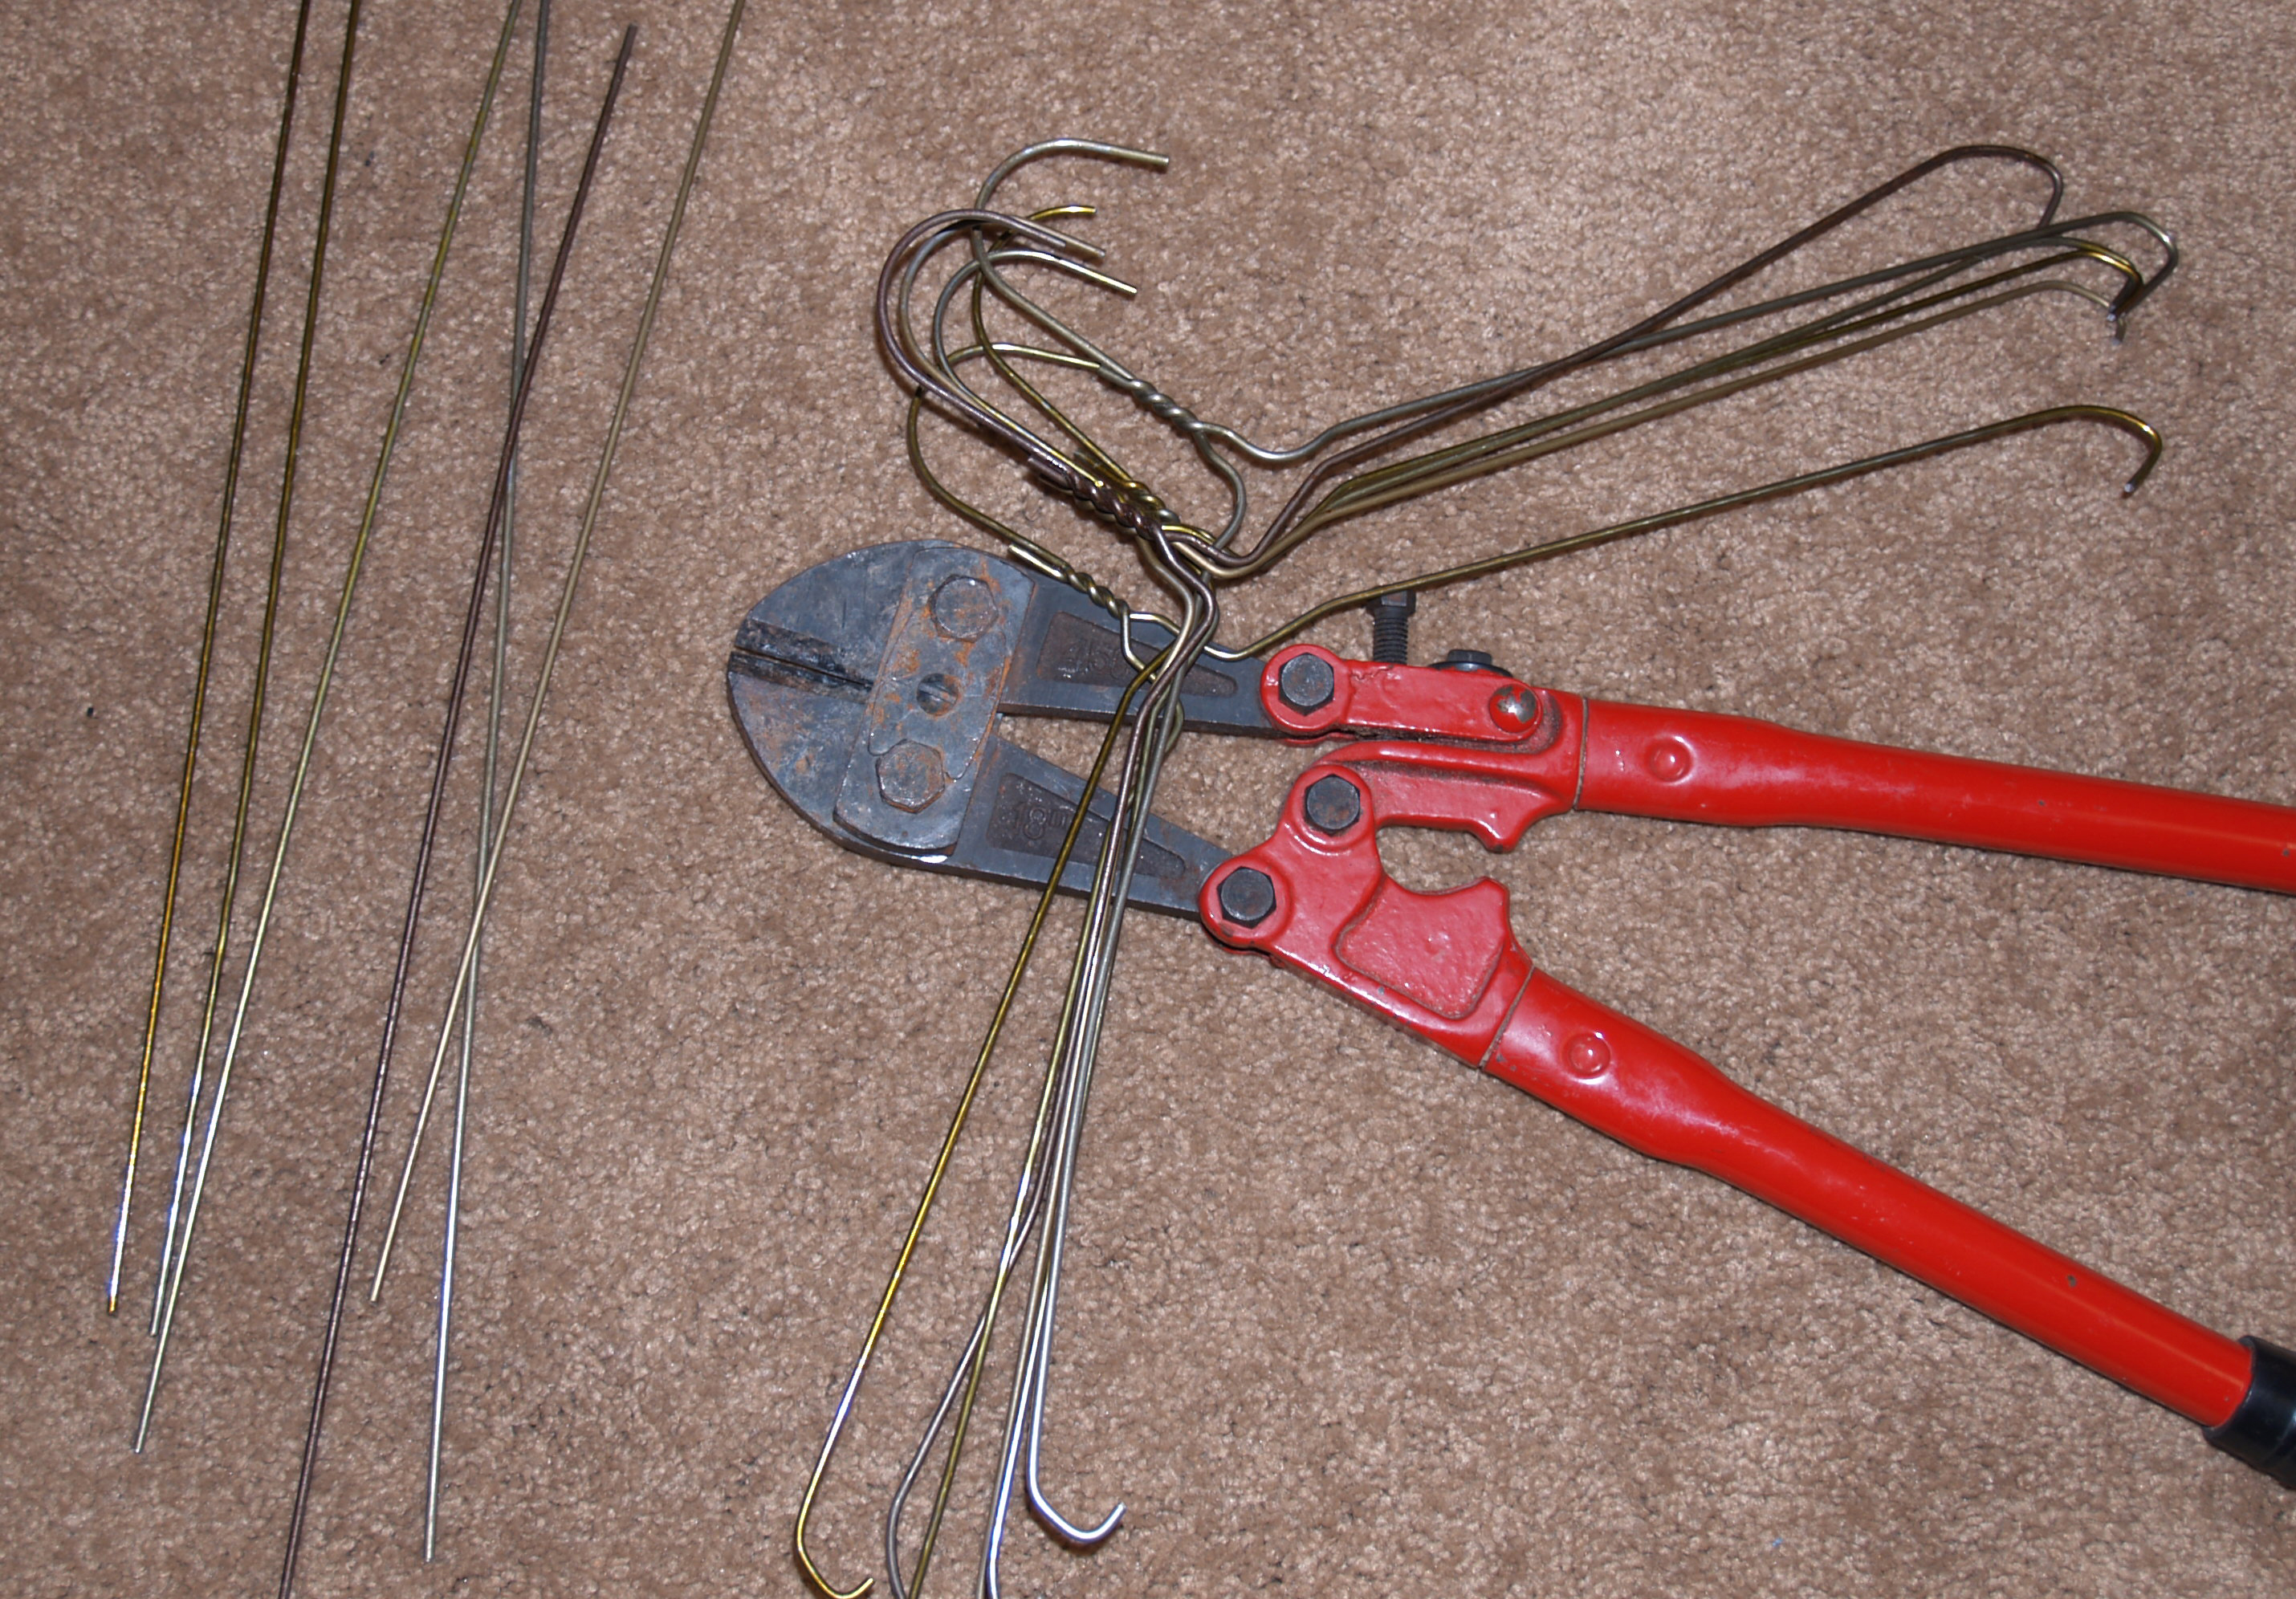
This is my first attempt at building the hopper holder with wire. I bought premade rings from Hobby Lobby, and the 16 gauge rods from Home Depot. They were strong and sturdy, but turned out to be more difficult to bend than I anticipated. I could bend them, but the force seemed unnecessary for this project. The pot is not that heavy. Plus, the rings kept falling off after the glue set and shifting around during gluing due to the wires not bending out to a perfect circle. Only some wires supported the rings, and that made them unstable and a pain to work with. That became a recurring scene several times, until I ditched the rings altogether. The hopper functions fine without them, they were also an aesthetic choice, like a spider’s web holding the pot. On the upside, a package of beef ramen and a small soup can were just the width and height I was looking for to hold the pot up during gluing. So soup is good for more than eating. Eventually, I snipped lengths off of coat hangers and found a happy medium: strength and flexibility. The rings still fell off twice though.

OLYMPUS DIGITAL CAMERAOLYMPUS DIGITAL CAMERA OLYMPUS DIGITAL CAMERA OLYMPUS DIGITAL CAMERA OLYMPUS DIGITAL CAMERA

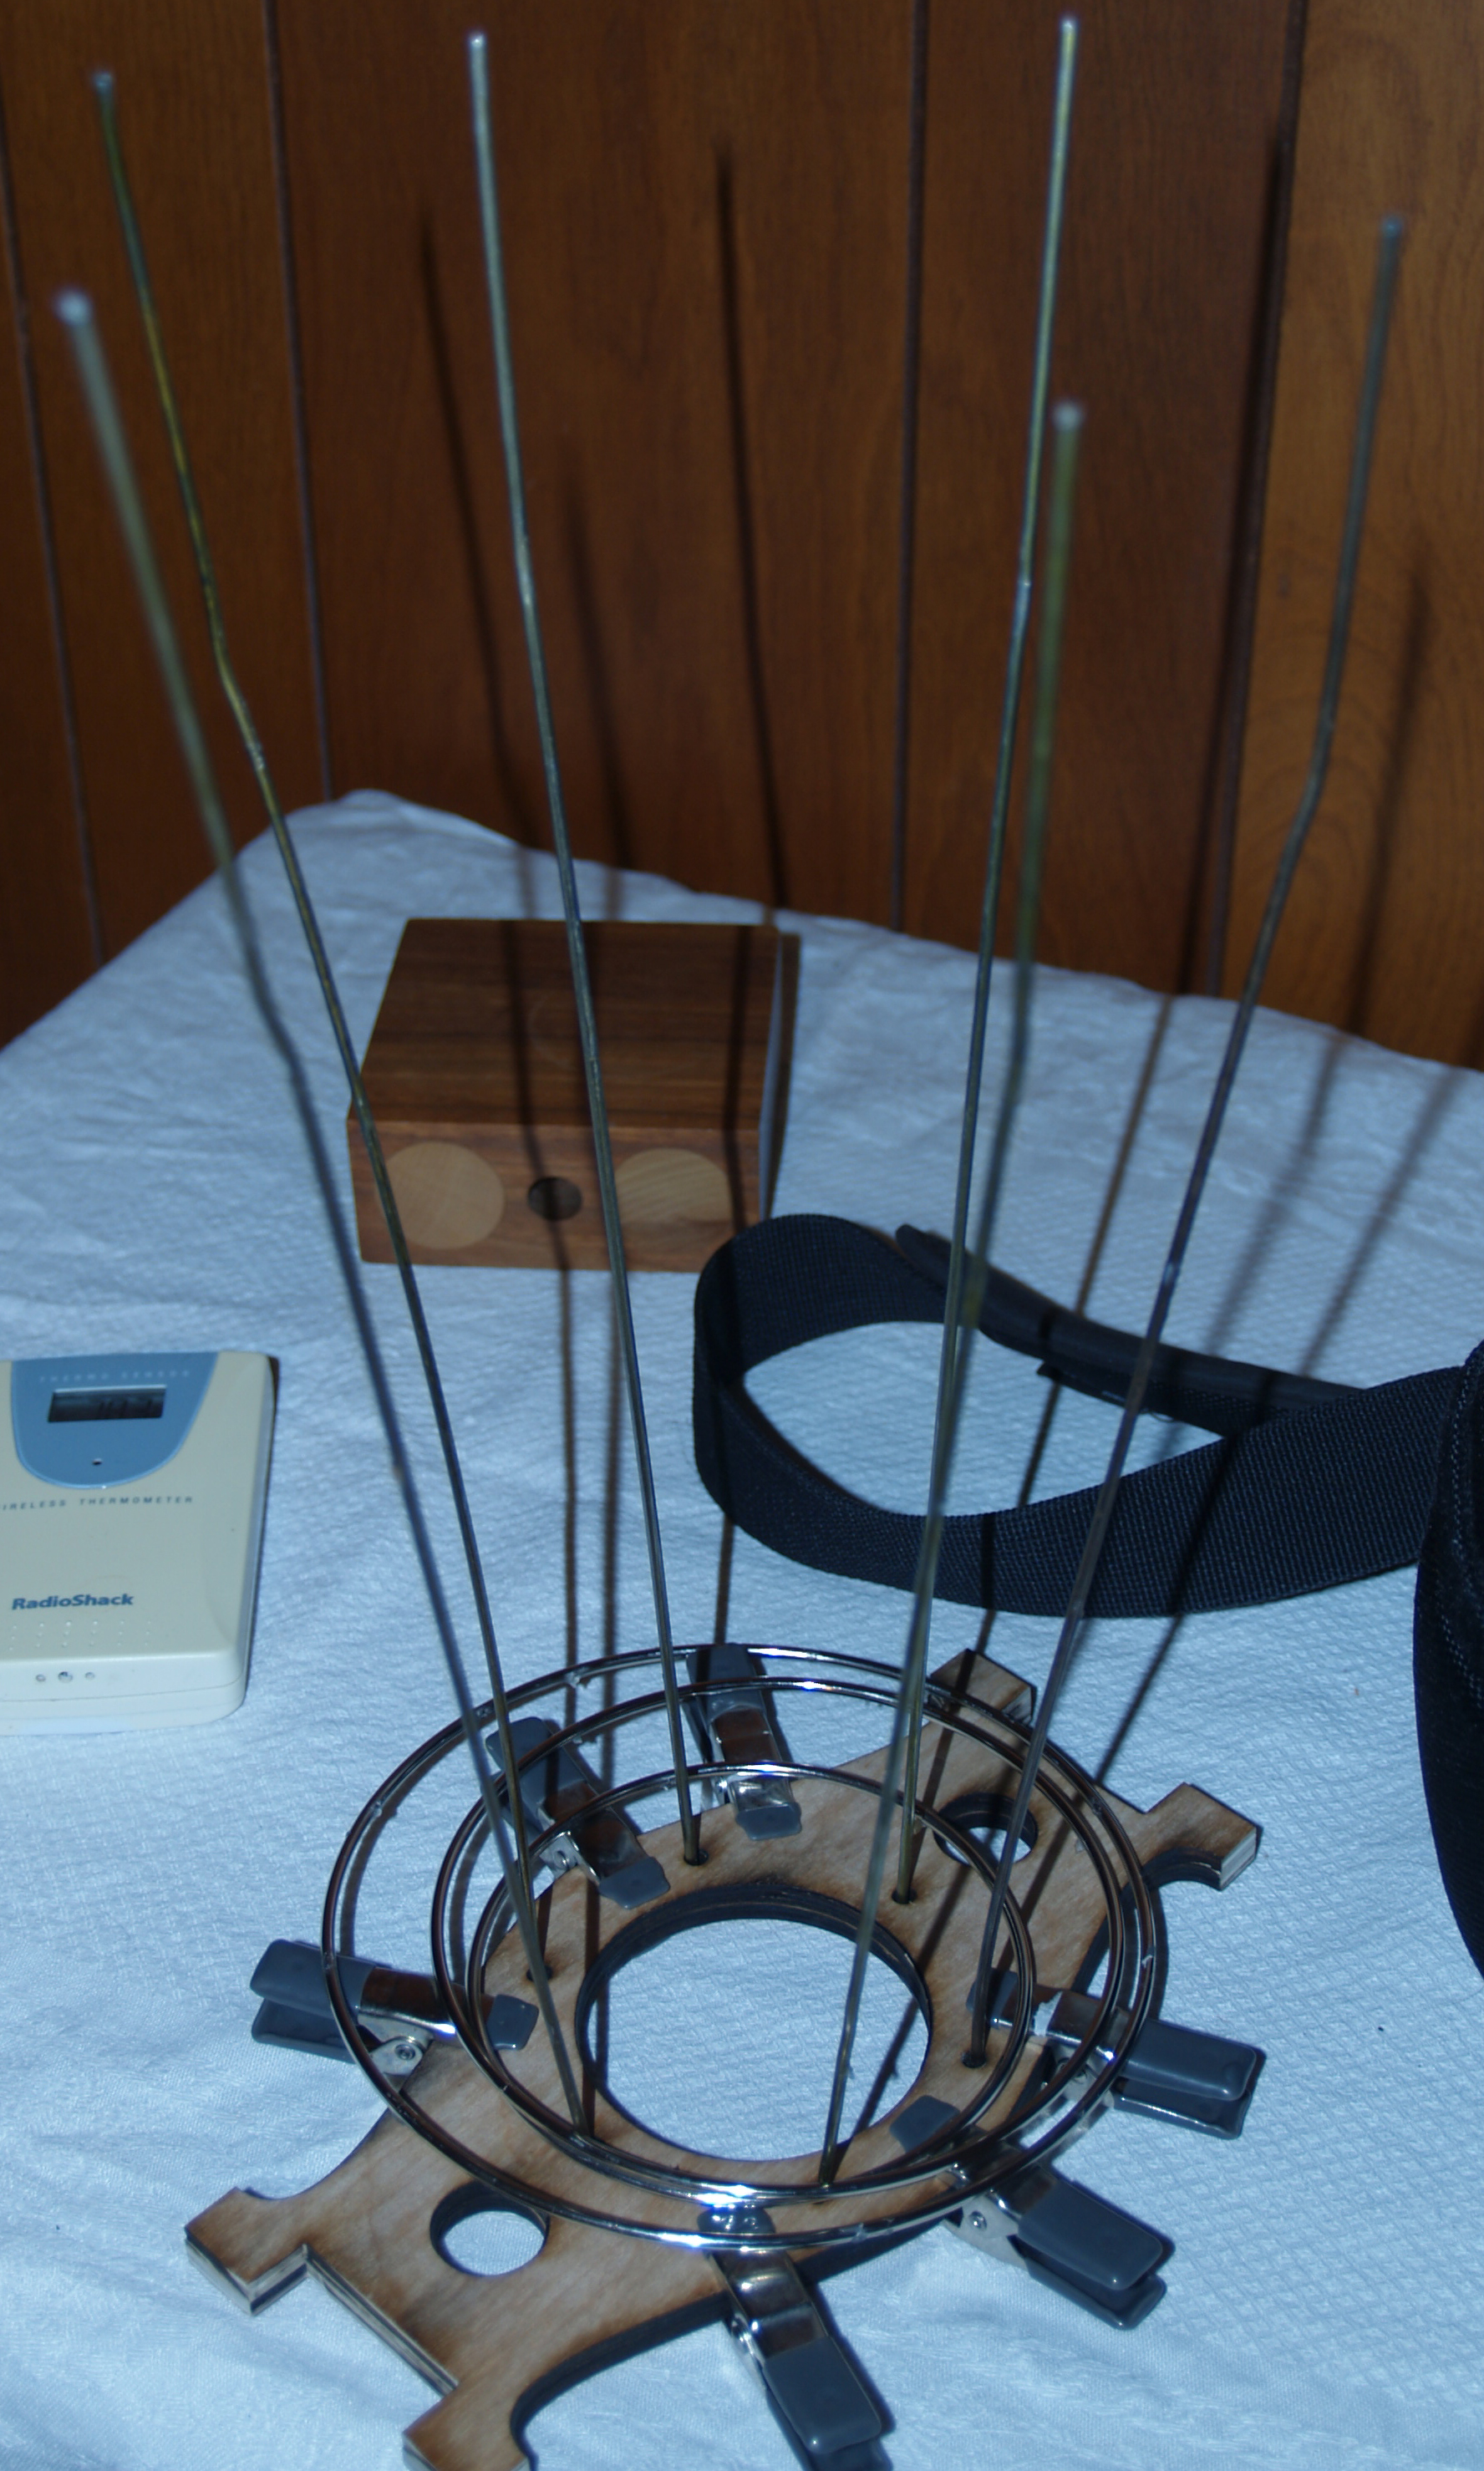
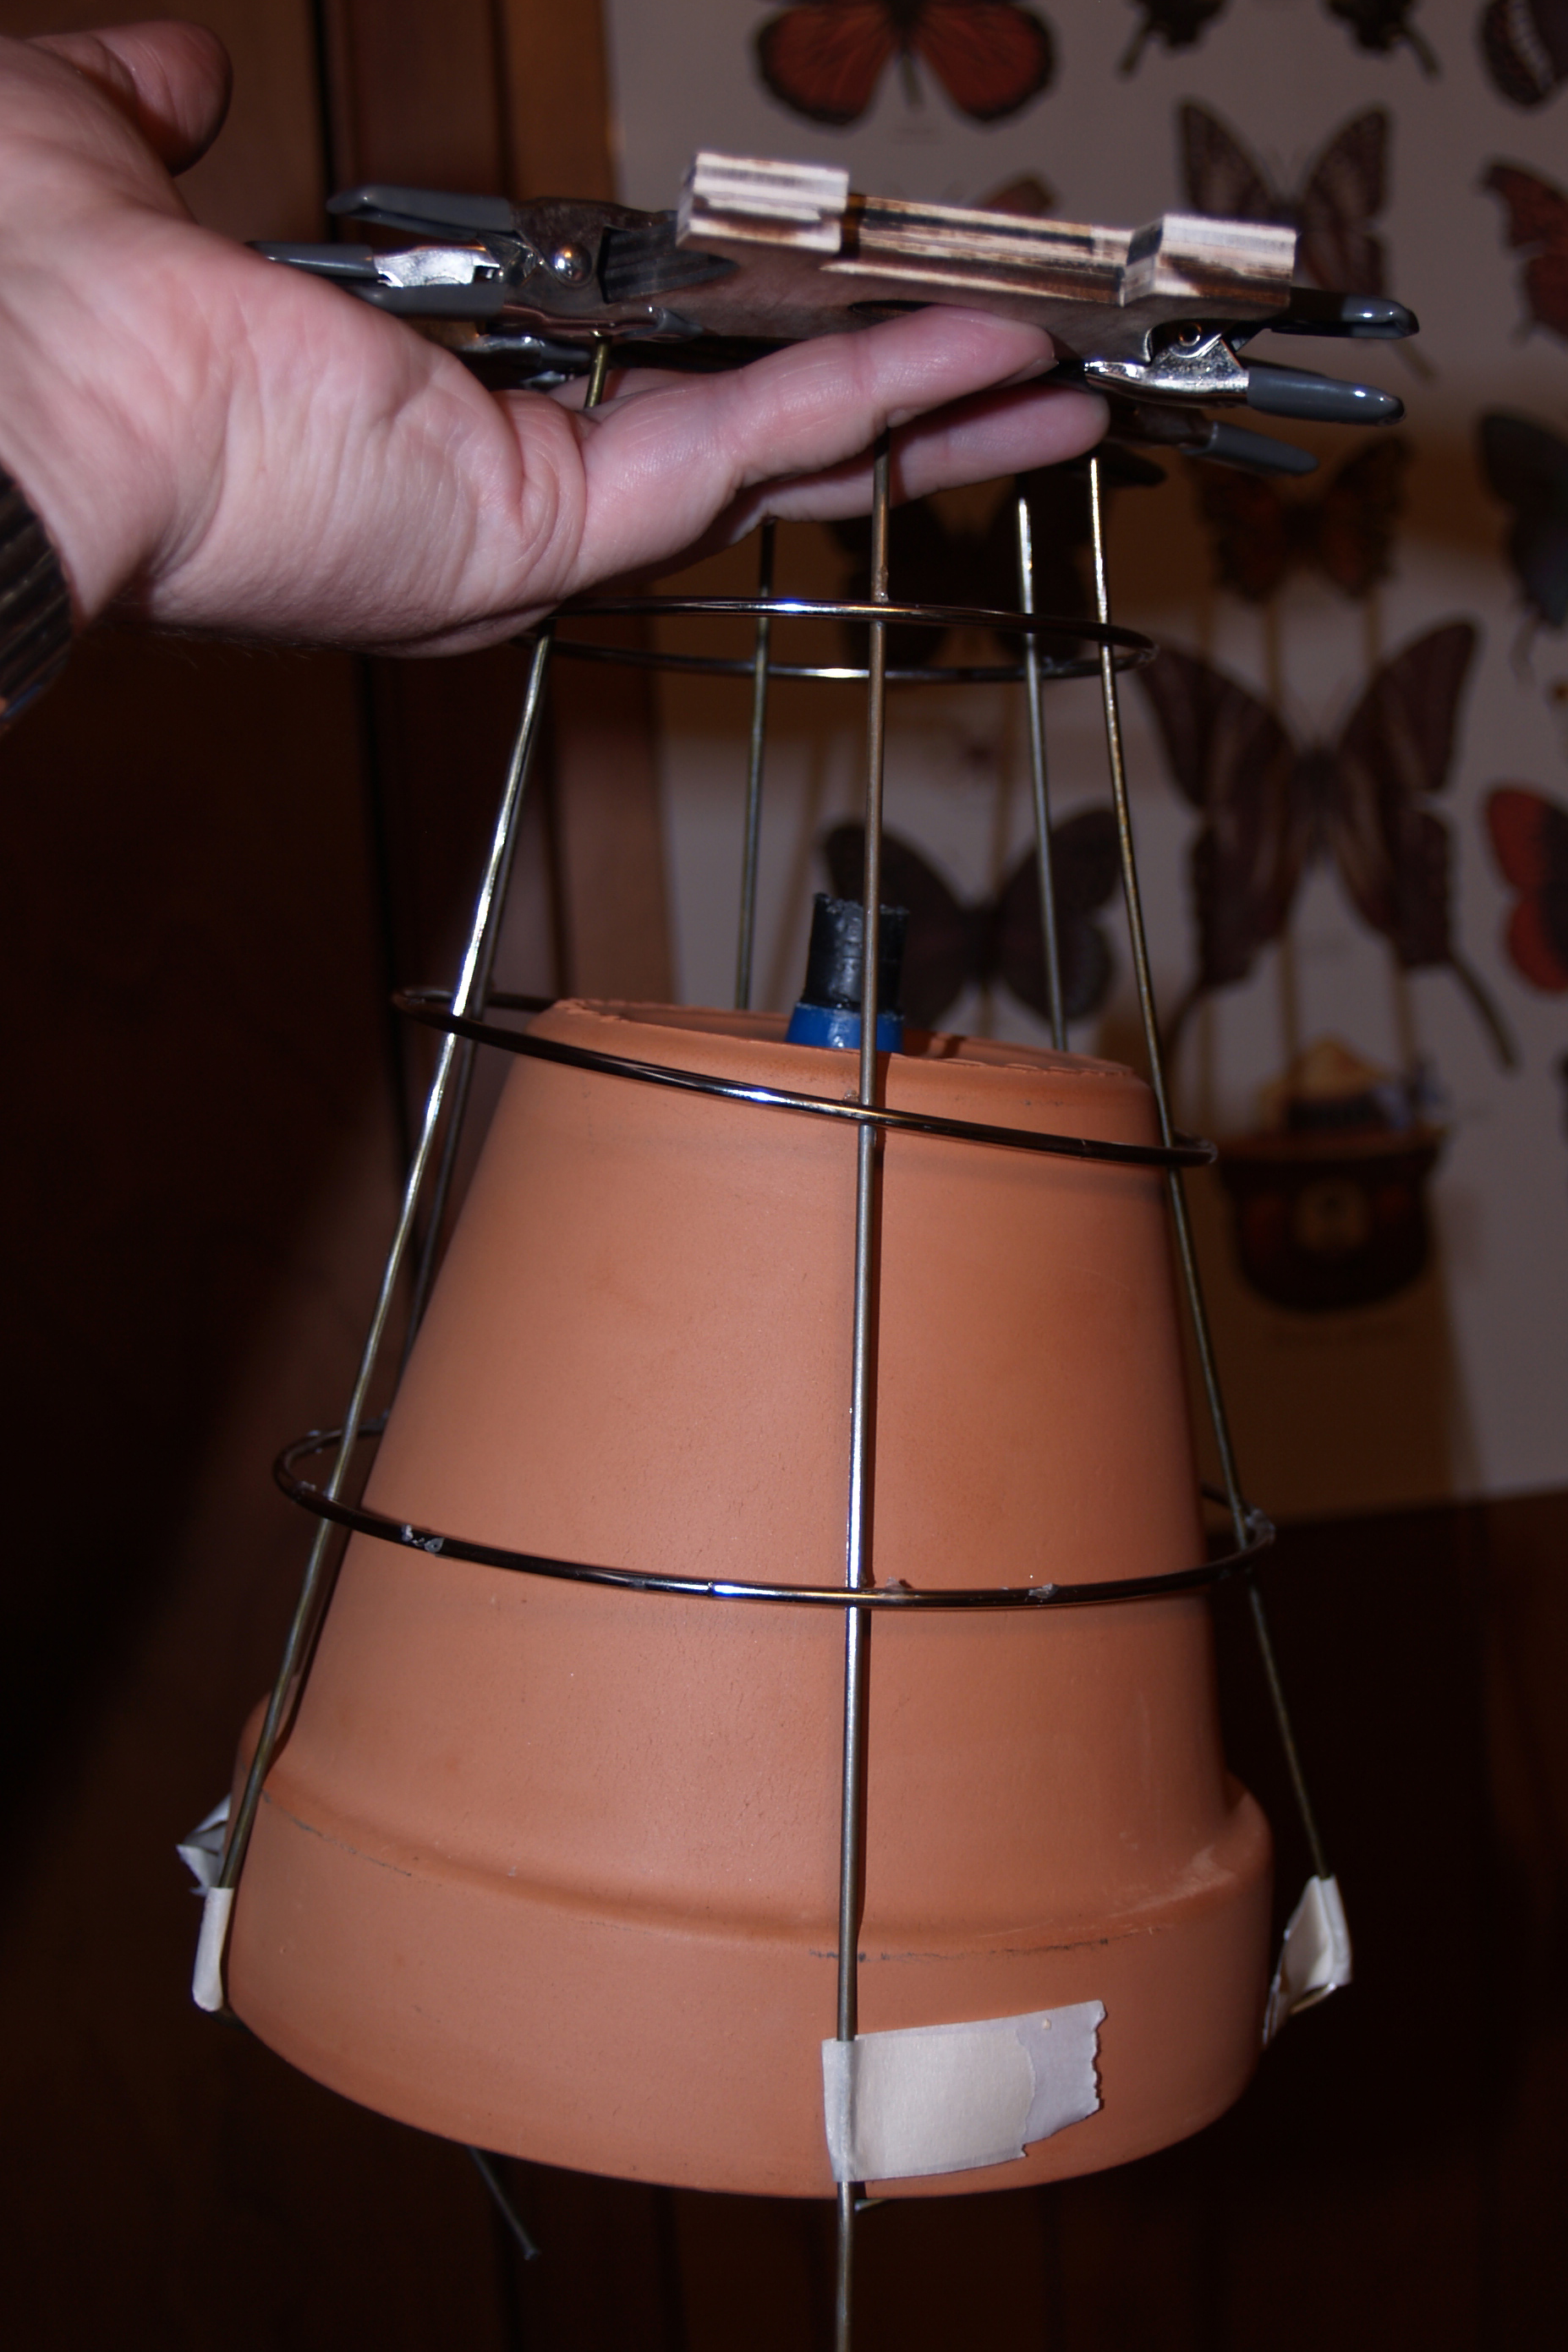
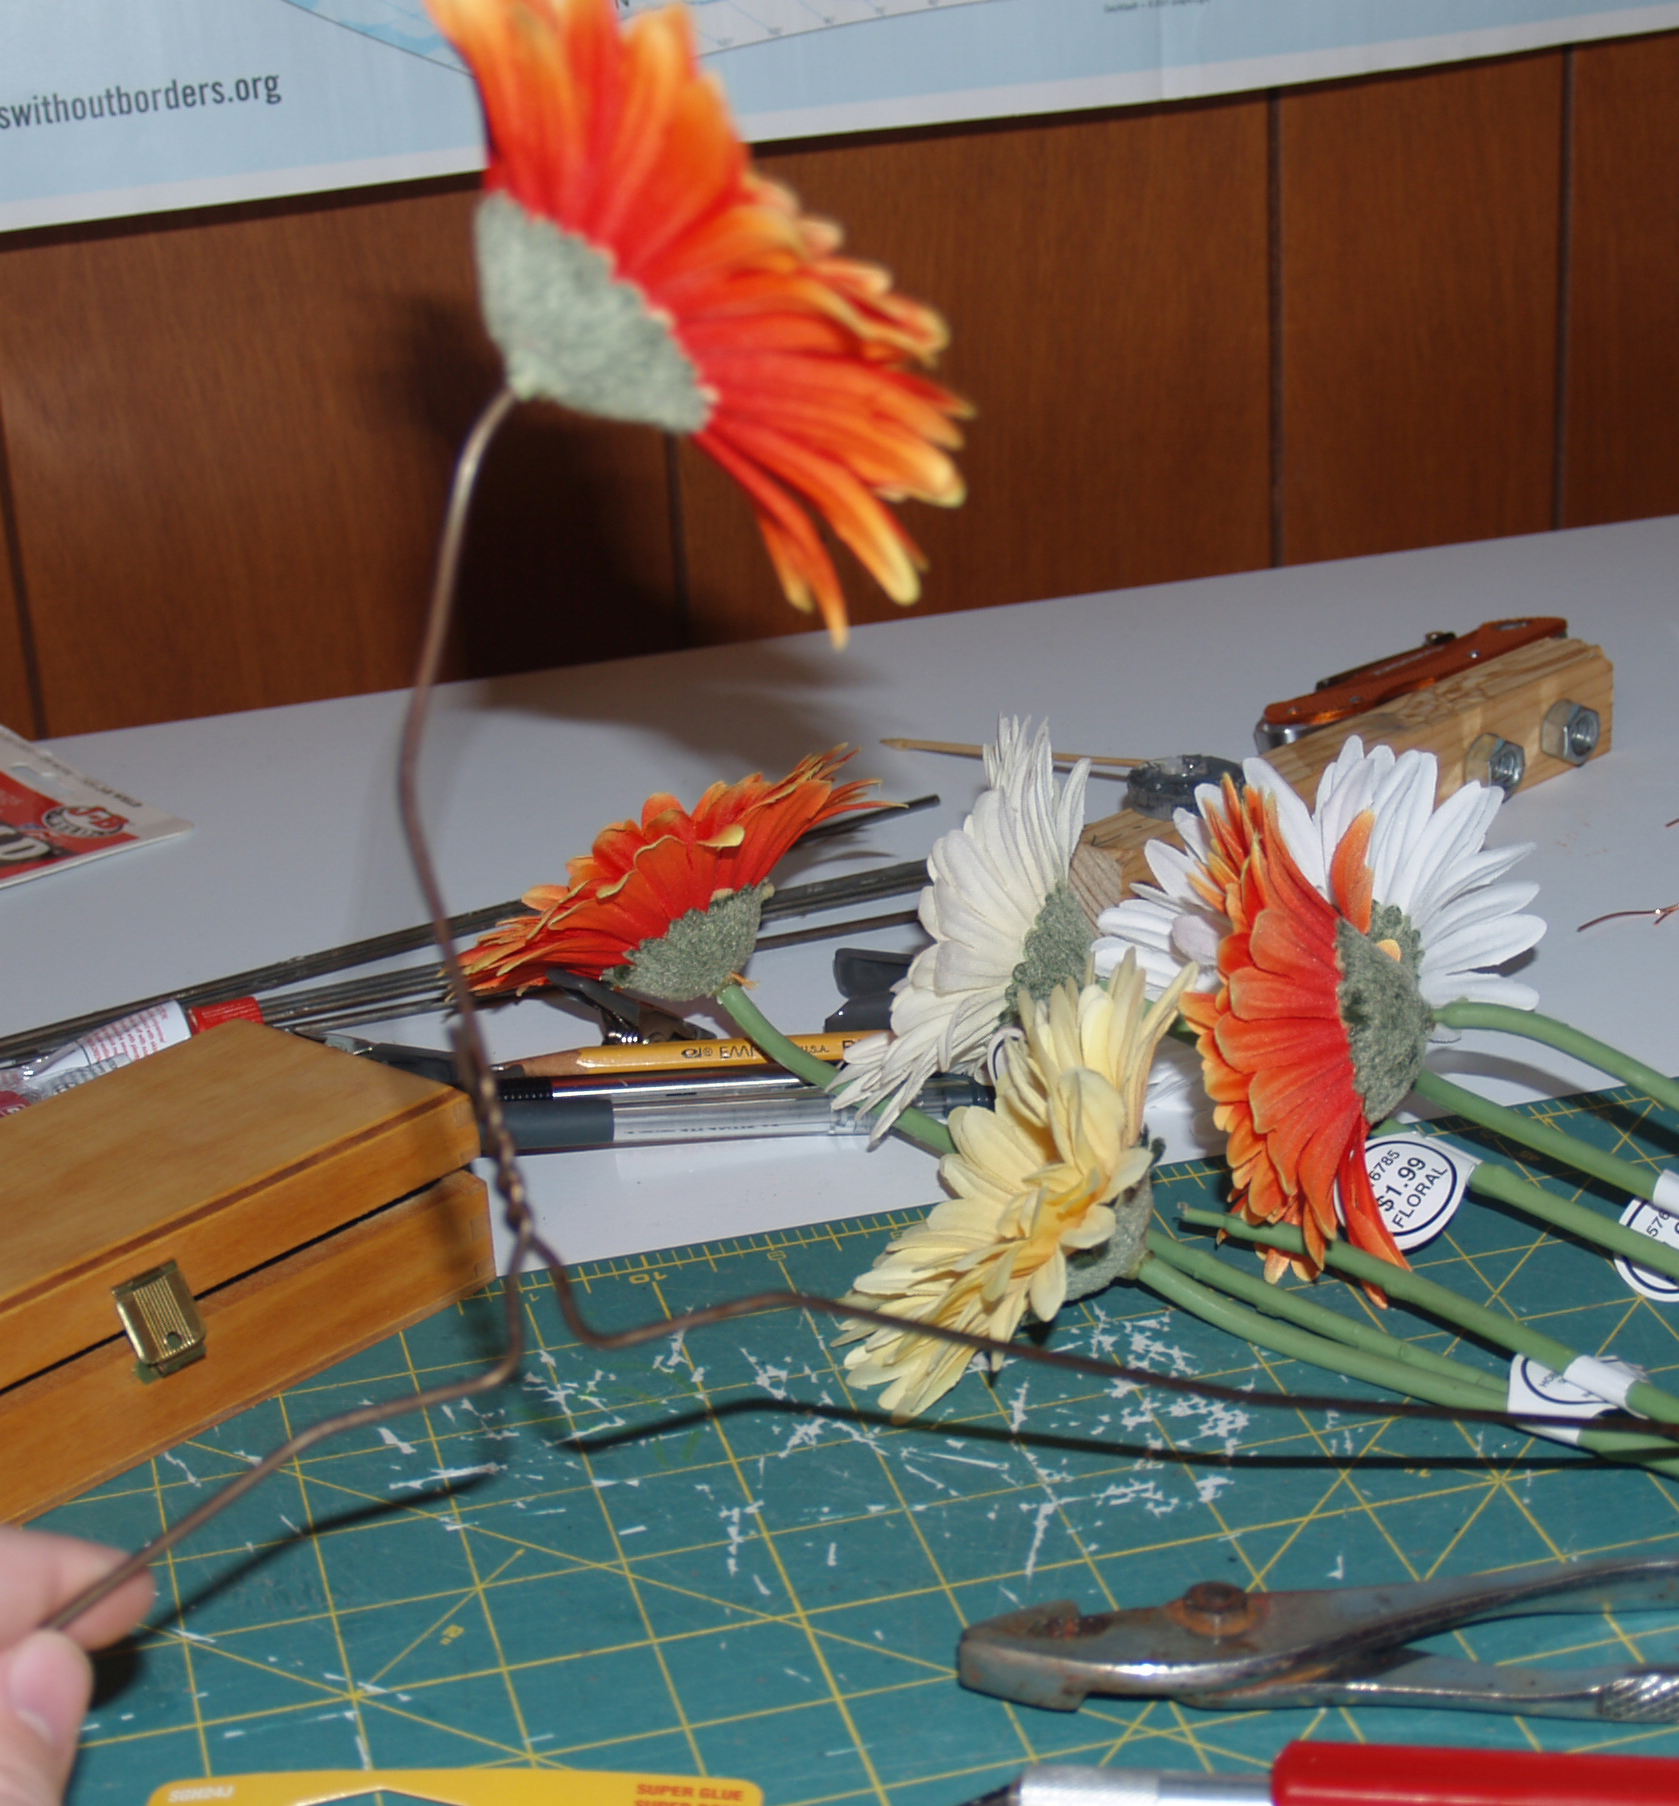
Still, the assembly would likely fall apart if the pot was left in continuously, so it’s not glued in. The pot is just set on top of the inlet hose into the coat hanger holders, and that holds it fine for my purposes. During the plan design, I had contemplated cutting wood pieces that were fit to hold the pot. They would have been curvy, come to a point, and hugged the outside shape. Those probably would have been sturdier, but I really wanted an ethereal look for the pot holder. Whether you look at the whole assembly and see the hopper as the top of a flower, the sun, or the roots, all three of those have an ethereal, thin quality. Wispy, almost. While something more than wispy is needed to hold the pot up, I tried to find a compromise. Because the game uses flower sprites to further the growth and circle of life from seeds, I decided since I couldn’t have the rings, I should push the flower aspect in my physical design, something I’d been puzzling over up until that point, how to tie the game more closely to the design. A few plucking of synthetic flowers from their synthetic stems later, with some super glue, and the hopper holder was finally complete.

OLYMPUS DIGITAL CAMERA

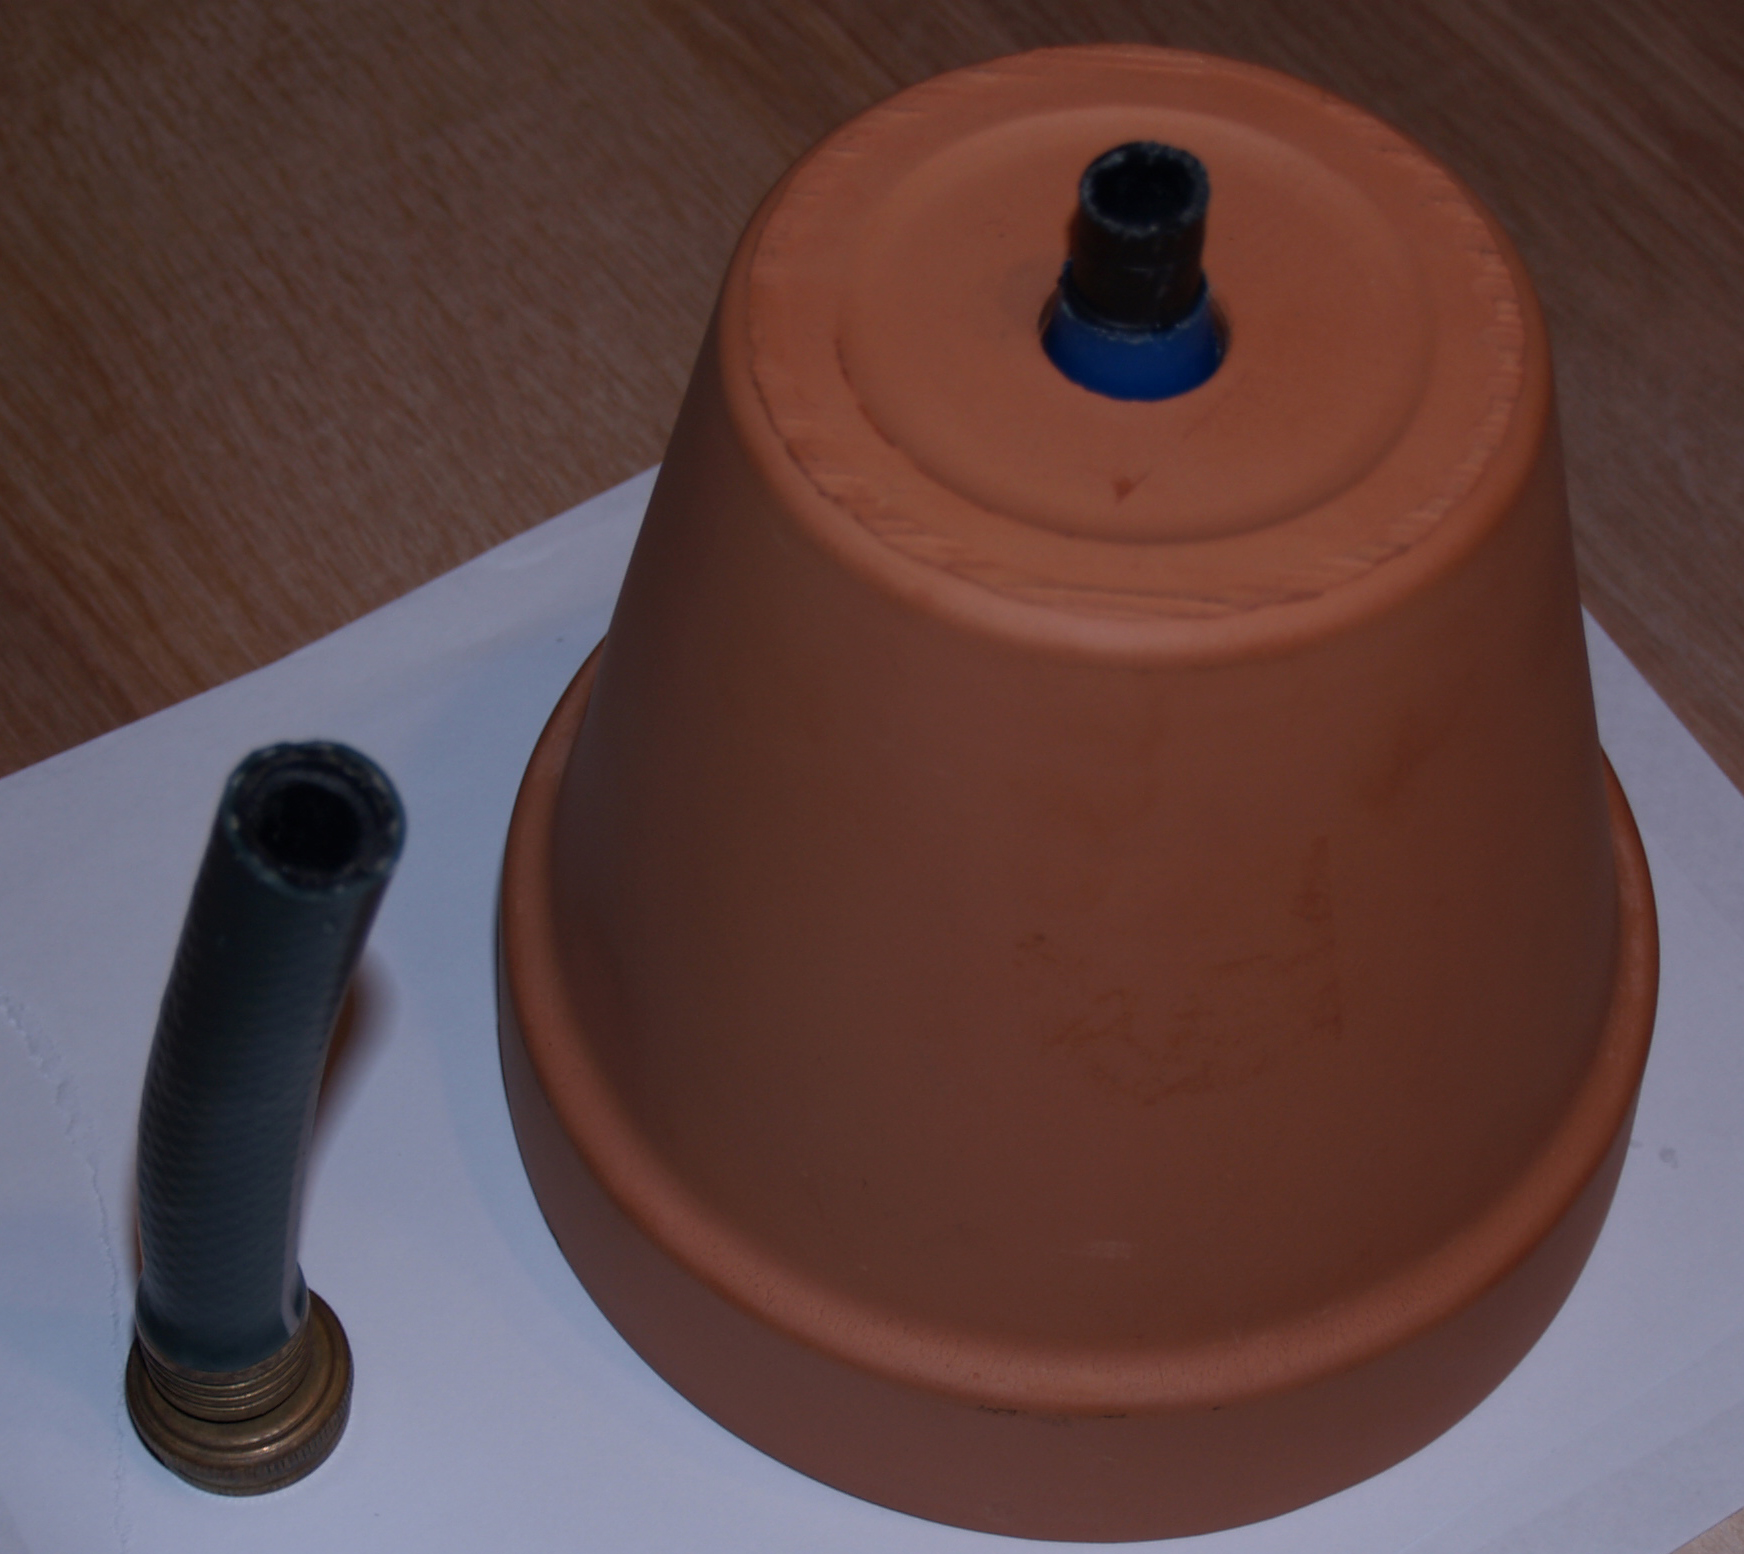
Part of this process of assembly was ongoing during setup and the running of Vizagogo, and since I was the exhibition chair for this year, which meant I could only work on those parts a bit in the morning and late at night when I got home. That whole hopper piece, with its multiple iterations, took several days for a relatively simple build. Simple, but frustrating with all the structural failures. But it finally works, and looks good I think. The dark smears on the pot are my aborted attempt to glue the same glass beads I used in the wheel to the pot. Hot glue would have been better than Gorilla glue due to it’s much shorter set time, but I was already hesitant about making the pot too gaudy, and I didn’t want to detract from the wheel.

OLYMPUS DIGITAL CAMERA

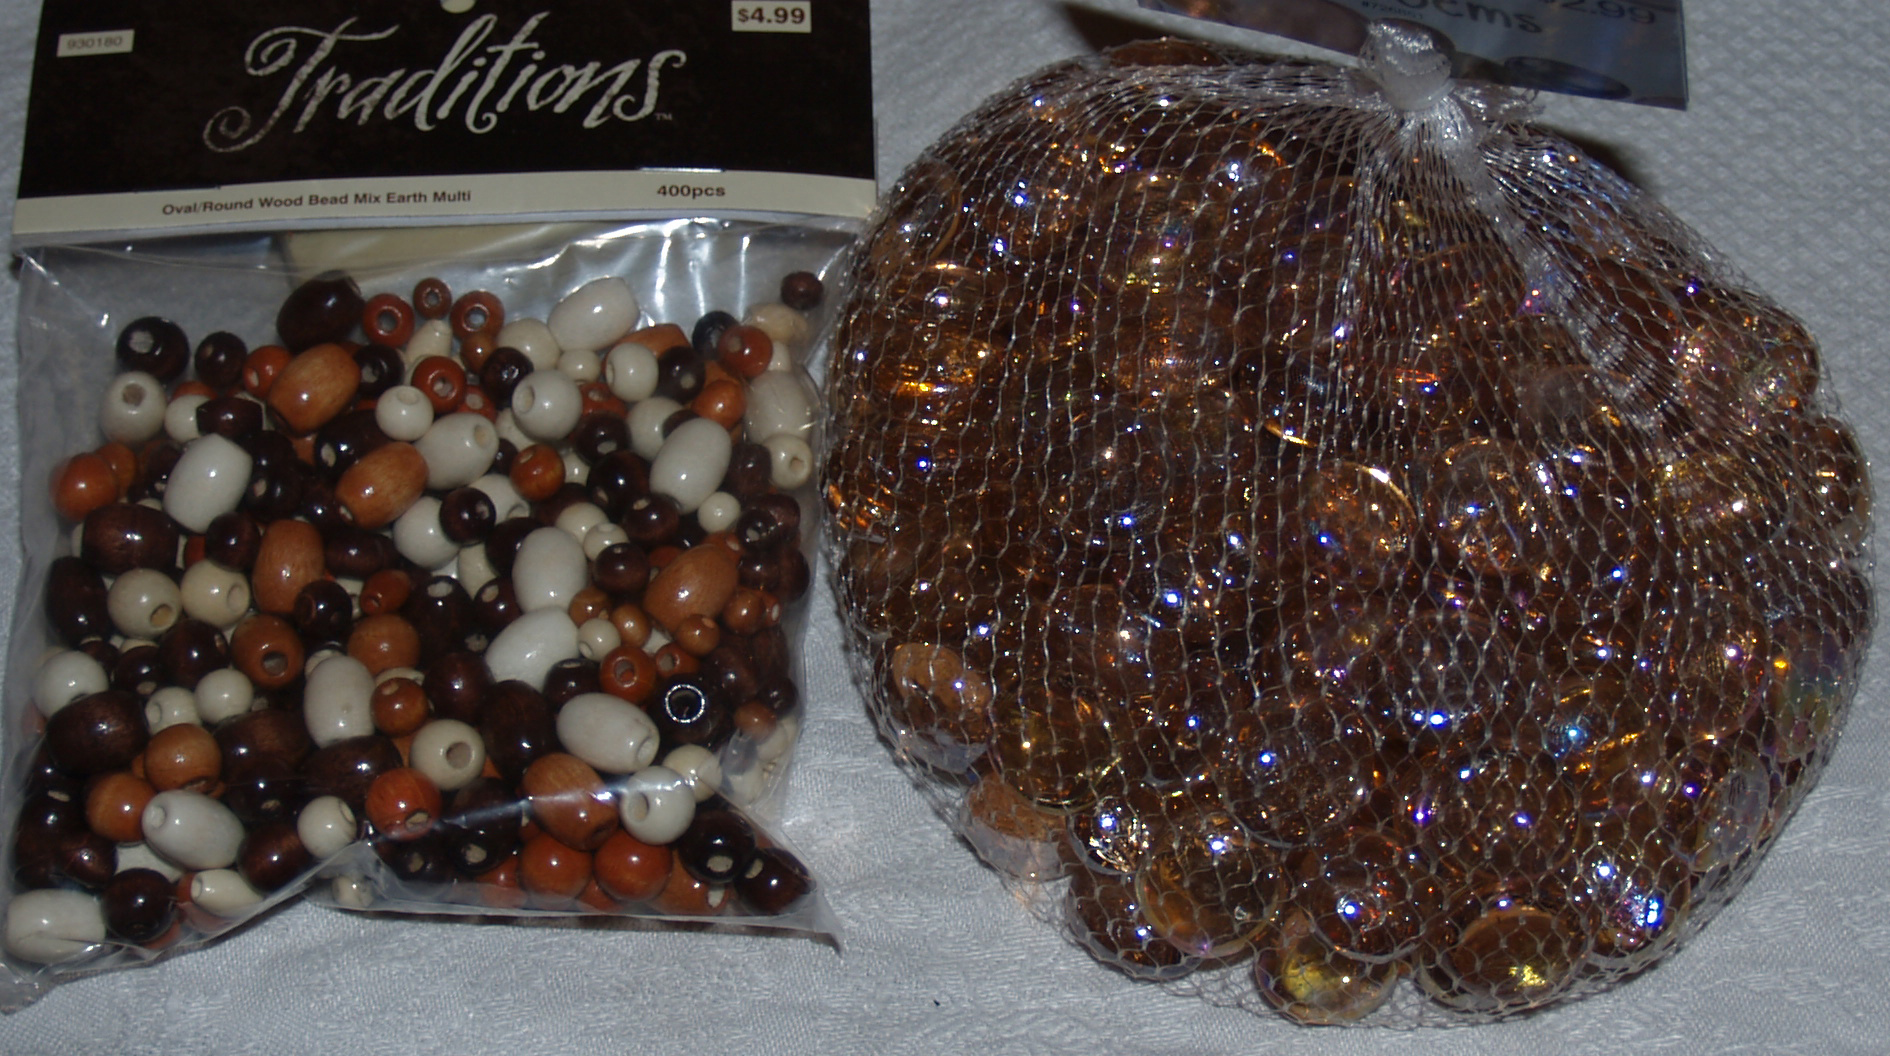
After nearly a full row kept sliding off the pot (Gorilla glue expands as it dries so that could have something to do with it), I stopped trying to glue the beads. It’s for the best, aesthetically. The pot, like many of the other components, is just a ceramic pot. It doesn’t need to be a shiny pot, that’s not its function. Such is my rationale. The pot serves its purpose, and its look shows that purpose, un-obscured by shiny blobs. Originally I was going to use the wooden beads on the left for this purpose, but I liked how the glass beads worked with the acrylic and drew more attention to the wheel.

The game was made in Game Maker, and I based my interface object between GM and Arduino on some very helpful GM forum posts I found during my research. This page was the most helpful. The GM object I downloaded needed some alteration to work with my project, but the scripts and library the object uses were invaluable. http://gmc.yoyogames.com/index.php?showtopic=530696

Eleventh Hour Update

Pieces are coming together. My game is 95% ready (art and movement tweaks, nothing that can’t take a few minutes for each). It’s exciting, and I may even have some hair left that’s not in my fists when I’m through. I kid of course, but since the deadline is this Thursday, with the Viz-A-Gogo exhibition opening a week from now, things are coming down to the end, and with that always comes some anxiety.

The stronger stepper motor came in early this week. It looks good and strong, just like the online sparkfun picture said. However one caveat is that I’ll need to solder short lengths of (probably 22 gauge–breadboard compatible?) wire to the wire ends of the stepper motor, since the ends are frayed by default. From what I can tell, another student, Sarah Spofford, is using the same or a very similar motor as I, so one question means answers for two students. Awesome when that works out.

Today, finish the plans; tomorrow, cut and glue them. I got the transfer between drawing my plans in Illustrator and importing them correctly into the AutoCAD woodshop template (on the correct layers for cutting), so that’s another interfacing issue of sorts solved.

Project’s being built, and the different pieces (game, dispenser, Makey Makey keyboard) are coming together. It’s likely that when I show this Thursday, the game sprites will still need work (I’m using holder images now that come with Game Maker but aren’t really polished for final work). Also, the pieces themselves can work on Mac or Windows, but the interfacing between the game and Arduino uses a DLL that (because it’s a DLL for one) require a Windows OS. I can still demo the operation with a mac, and manually set the dispenser wheel to dispense seeds (push a button to simulate the signal GM can send to the Arduino on Windows). Viz-A-Gogo will have a Windows computer, but for Thursday, a mac will work fine.

One thing on the keyboard–I’m leaning towards using apples for the 6 keys. For one, there are enough different color combinations with apples to be varied enough while still reading as, well, apples. They’re firm enough to resist a the bit of pushing, over and over, that the fruit “keys” will require. Plus the Makey Makey requires either enough metal or moisture to conduct the push signals, and apples certainly have plenty of moisture. It’s likely I’ll need to replace them between Thursday and when the show ends next weekend, but that’s just a matter of pulling the pins in the apples out and sticking them in another apple.

Knock on wood.

Tomorrow, I will complete the wood shop authorization process, so I can laser cut my dispenser design. It’s been several years since I last used the shop, and the authorization expires every year. Nothing too strenuous, just a quiz and safety tour, a signed form, and I’ll be good to go. I plan to have the pieces cut by the end of the week so I can put it together over the weekend. I ordered a new stepper motor that should work better for this project than the default one we have for this class.

Also, the Makey Makey arrived last week.

The timetable for all this has changed somewhat since I added the feedback of the dispenser, but with the simplification of the game and the wood shop stuff moving along, this can still be done.

Simply giving back to the Circle of Life

Expanding on the most recent project progress presentation, I’ve figured out a simple yet effective way for this project to give something back to the player.

First off, the game mechanics have been simplified, from something resembling Conway’s Life game to multiple simple interactions similar to the popular mobile game Fruit Ninja. For those unfamiliar with it (I’ve never played, just watched), the object is basically to swipe your finger across fruit flying across the scene. This is what I proposed a week ago in my April 2nd post, but with the automatic seed dispenser added. I will put up a more detailed description and pictures of the game once development gets farther along (within a week).

I’ve made a controller object in Game Maker (GM) and an Arduino program so that when a specific game event happens, GM sends a signal to the Arduino, which now…

…turns on the Arduino’s built in LED. But the process is there. If GM can correctly send a signal that is correctly interpreted by the Arduino, then that signal can activate anything. It’s a simple matter to increment the stepper motor a certain number of degrees each time GM sends the signal. The device is beautiful in its utter simplicity, yet I can see this working as good or better than any of the other more complicated devices I thought up since the most recent update.

The picture is below, but the basic process is a rotating gear like wheel that pushes a certain amount of seeds down and into a chute, from which they pour into a receptacle. For thematic reasons (planting, growth) I picture a small clay pot catching the seeds, which the artist/player can pick out (might need to rais the bottom of the pot for easy gathering. Picture this device, no bigger than a normal sheet of printer paper, and you are viewing it through its clear acetate side. The top hopper, wheel middle section that the wheel rotates in, and the chute are made from pieces of sandwiched wood, cut on the edge in the design shown. Two pieces, one for each side, say between 1 and 1 1/2 inches thick when it’s finished. Seeds would need to be small enough to fit in the turning wheel sections and chute, and also to not clog up the mechanism as they drop into the wheel. In other words, any shearing forces exerted on the mass of seeds should push the seeds back into the hopper, rather than seizing up the wheel. In  other words, most fruit or vegetable seeds should work, but corn or pumpkin sized seeds could cause problems. Maybe not, but smaller seeds have a better chance, and since this dispenser is largely symbolic about giving back to the player a reward for growing more objects in the game, the purpose is served. Maybe give multiple seeds (bird seed type mixture)? It’s all art, and this can be decided later.

Click on the thumbnail for a larger version.

seed dispenser

Project progress

The Makey Makey has been ordered, so that’s on schedule. It should arrive next week as planned.

Thinking more on my game, I’m drawn toward Cellular Autonama, particularly Conway’s Game of Life. One change that will greatly effect the implementation is that the cells will be hexagonal rather than square. Hexagonal tiles are common nowadays for strategy based games (more on this later), and I believe that hexagonal tiles are more aesthetically pleasing than square or triangle tiles (the only other regular polygons that can be fit together with no space left between their seams).

For future reference, the rules of Conway’s Game of Life are listed below. (http://www.conwaylife.com/wiki/Conway’s_Game_of_Life)

  1. Any live cell with fewer than two live neighbours dies, as if by needs caused by underpopulation.
  2. Any live cell with more than three live neighbours dies, as if by overcrowding.
  3. Any live cell with two or three live neighbours lives, unchanged, to the next generation.
  4. Any dead cell with exactly three live neighbours cells will come to life.

Conway found that these rules produced the widest variety of desirable representations. Some can die quickly, others can grow quickly, others can die or grow slowly, and so forth. Because this game will have six surrounding cells, instead of eight, the rules might be tweaked, but since the numbers are close in range, I’ll begin with the above rules and experiment from there.

The strategy element could be end conditions, like once the pattern stabilizes have only a certain number of tiles left alive, or have the tiles left alive be a certain color. Which brings me to my secondary goal, implement more than two states for the cell.

At this point, I see two main ways to decide the 3+ states for the cell, shown by color. If a cell is alive:

1. Color is determined based on which of the six sides are filled in relation to the other sides. For example, following the rules for Conway’s Game of Life, two cells on opposite sides of the hexagon in consideration would produce a different color than two cells touching each other next to the hexagon (think three collinear hexagons versus three hexagons all adjacent to each other). Both sets described above are “alive”, or colored, but the arrangement determines the color. This is currently my favorite, as I see it as a balance between not an excessive number of states to consider and still being able to produce aesthetically pleasing results with color.

2. Pretty much the same as (1) but color is determined or at least partly influenced by the color of surrounding cells. This is more complicated than (1) and so will likely just be a thought experiment for this particular project. Many times simplicity is beautiful, and (1) strikes that balance where (2) performs less well. Not saying it wouldn’t be beautiful or couldn’t be done (neither are the case, I’m sure), but this option is outside the scope and time of this particular project. Plus, this means more rules to explain to the player. Conway’s game has only four to consider; I don’t want this implementation to have much more. Still, this option is mentioned as a possibility for expansion.

Update:

After chatting with my professor, seconds before I wrote this paragraph, he suggested I explore more of a cyclical approach (give something physical back to the player), instead of a one directional approach (i.e. push a button to affect the game). Like once the player wins, give the player some seeds and encourage them to plant them. Just a possibility to consider, we’ll see.

Art Fruit project schedule

April 4:

*Have Makey Makey pieces ordered–project confirmed

*Have art game mapped out (what will happen based on player actions)


April 9:

*Have first game prototype completed to show

April 11:

*Makey Makey pieces arrive by now? Start testing different foods as keys–hook up and test game with food pieces


April 16:

*Have second prototype, requiring just tweaks.

*Have costume/prop pieces gathered. (knife, apron, chef hat?)

April 18:

*From Tuesday, have game to demo with Food Keys–take suggestions


April 23:

*Have suggestions incorporated into project, final game tweaks.

April 25: DUE

Final Project simplification and reorientation

Well, I was hammering out a specific schedule for my final project, and I came to the conclusion that I needed to greatly simplify my plan to allow for completion with a little extra time for tweaking and bug fixing. With getting the Arduino to communicate multiple data pieces to Game Maker, polishing the game (user interface, game objects), completing the game art, acquiring and building the controller, this project would not be completed by the time, and even if it was, it would not be polished enough to be proud of.

So I’m planning on doing something similar (building an unorthodox controller for a game I create) but simplified enough so that it can still present artistic, technical, and conceptual work, but not be so large that it can’t be completed and polished by the due date.

I actually came upon this option earlier while researching how to get Arduino to sync with Game Maker. I asked around on the internet, forums and the like, to see how anyone had solved similar problems, and one of the people I asked was very helpful and gave me two options for communication with Game Maker. One of those options I really started to get excited about the concept, and the site is here: http://www.makeymakey.com/

Makey Makey is a keyboard and mouse interface developed by two students from MIT that allows designers to, basically, use anything as a keyboard. It’s quite amazing, as the demo video, with real working examples, shows. In the end, pretty much anything can be used to transmit a signal: food, stairs, water buckets, even other people. Just hook up the object to the Makey circuit using an alligator clip or regular wire, and that object is a key. So how does this relate to my earlier project?

Well, this piece will have a performance aspect, in addition to the game and controller that anyone can play. Really thought, this game will not have a specific “win” condition, only a continual evolution of image, so it could be called a toy, that doubles as art. The toy will be simplified in purpose, and also execution, so that anyone can come along, and for even a few seconds, play with it, then leave if they want with no ill effects on the overall image. Objects can be moved on screen and interact with each other, but while no one is playing, it will sit there as generative art, in a sense. Each player contributes to the image on the screen. I also feel this “come and go” aspect will be more engaging for exhibition goers than a game with a definite beginning, end, winning/losing, and rules to learn. There will be rules to this piece as well, but only in the form of moving up/down/left/right, and choosing an object to move. When objects on screen touch, they will react in beautiful ways, producing more art objects to interact with, and so on. This simplicity should draw more people into the process of creating the image, and enjoying themselves while creating art.

So, what about the physical aspect of this, you ask? Well, in order to create the art, the artist/exhibition goer will first need to hook up the “keys” to the controller. I like the idea of using food for the keys, because since food is essential for life, now food will be essential for art, particularly this art. Players will choose what objects to use for each key based on their personal preference (a fruit/food bowl will be available to choose from). If, it turns out that the Makey kit works well with chains of food to conduct the signals, then I would like to incorporate that also, so players make their own connections. Imagine me, as the presenter, slicing an orange and overlapping the sections to allow a very tiny current that Makey requires, to be sent along the length. This particular overlapping sections idea is untested, but if it works, even for just a short length, it will be incorporated to add to the player’s involvement in creating the connections (itself artistic) in order to create the art.

No player made connections, no art is created or game like experience is enjoyed. So essentially, this is a very analog way of looking at DRM, as well as engaging the player. I have used “artist” and “player” to describe the same person interacting with my exhibit because both terms apply. Winning for the player will mean creating the connections to allow the “artist” side to help create the art. Until that artist decides they’ve done enough and leaves, and another artist can come along and generate even more art, evolving the images through their choices.

I am excited about this new direction, not just because I imagine it being visually engaging, both in a quick “come play with me” and a deeper “help me evolve this image”, but because of the practical side of this being very doable by the due date. Its simplicity will be both completable and engaging. After all this previous process with my earlier project idea, after all the research and testing, I agree with Prof. Galanter that my earlier idea presented very real issues with completion. This project can have an interesting design, as well as show attention to all three aspects: concept, aesthetics, and technology.

Final project pre-presentation

Digital Rights Management (DRM) is not a new concept, and it is not exclusive to games, but DRM in games does exist in various ways. HowStuffWorks has an informative article on the history of DRM and various techniques it employs (http://computer.howstuffworks.com/drm.htm). Put simply, DRM is any method employed by an artist or publisher of digital content (music, movies, games, etc.) to eliminate or at least decrease the pirating of said digital content. Some examples, not restricted to games, would be a publisher controlling the amount of times digital content could be copied, the amount of separate computers that could access the content, or writing code onto a CD that deliberately confuses copying/ripping software. In games, DRM is handled inside the software. Some part of the game enforces the protections the designers have placed to handle piracy. Games may need a unique code before playing that is only available on the CD, for instance.

However, until now, DRM has not been utilized through the game controller. The practical side of this makes sense—some games can be played with either a joystick or keyboard for instance, and controller-side DRM would mean making two protections for only one game. But blow that away for a minute and consider this: how could a controller-side DRM scheme be feasible? One way is with old-style arcade game setups, where the game was housed in a large cabinet/desk type contraption. Think video game arcades. Those would have been difficult to steal (can’t exactly stuff one in your pocket), and even if that copy of the game itself was stolen, it would be designed to run on anything except the large arcade machine. So, design a game to work with one specific controller, and make that controller impractical to steal. This is how I’m looking at DRM for this project.

My project will take the form of an arcade game housed in its own housing. The main DRM aspect will be handled with two turn key controls (turn a key to activate a sensor) set on opposite sides of the housing. Why two keys and why on opposite sides? That leads into the second design aspect, that this arcade game and housing will be built to make it unfeasible for one person to play the game alone. Thus, this will be a cooperative arcade game. But where most cooperative games feature separate characters to control, this will feature only one. Two players will therefore need to communicate quickly to control a single character through the maze/arena filled with hostile objects to eventually defeat the final boss character (huge amounts of health and attack power—standard boss character concept). More on this two person setup later. Through this communication and camaraderie, the players will hopefully be less tempted to pirate the game, just in case the controller setup is not deterrent enough.

According to the article linked earlier, a successful DRM scheme aims for three things: establishing copyright, managing distribution, and controlling what a consumer can do with that content. This game controller establishes my ownership of the game through its presence and, well, control over the game. Because this game will be set inside the code to only recognize this controller, the housing controls distribution. And finally, the players can only do what the controller will allow, and the key turns bring this point home. The controller controls not only the game, but access to the game. The idea is that the arduino program that sends the sensor input into the game for actions like moving, shooting, equipping items, etc. (as seen in the class demo) also keeps track of the time between key turns. Both players turning their respective keys together (keyword—both) resets the timer (an LED bar on the housing can visually inform the players of the time remaining). When the timer is reset, it starts counting down again. If the players do not successfully reset the timer before it runs out (say, if they are too engrossed in the game to remember), then the controller will stop sending signals to the game until the timer is reset. Are the players fighting a group of enemies at the moment? Well, they get to scramble to reset the timer by simultaneous key turns while they watch their character getting pummeled onscreen. The game waits for nothing in that respect. With the non-pausing in these moments, the near simultaneous key turns required by both players, and the LED bar showing the timer’s progress, this project will hit the players in the face with the fact that DRM is put in place to crack down on unauthorized use, whatever the developer says that entails.

While some might comment that this system bears a resemblance to the old style arcade machines requiring pay to play upon starting a new game or to continue a game upon death (put in a quarter to begin or resurrect yourself), this is different in one key way. The game has no idea if the keys are being turned, and does not care, hence the non-pausing nature. To be clear, the controller (arduino) handles that aspect, both in timing between key turns and whether or not to send input signals from the players into the game. The game chugs along regardless.

Here, you can’t circumvent it; it’s physically built into the project, more specifically the controller for the game. Just to keep the players on their toes, if they successfully reset the timer without letting it run out several times in a row, the timer could become random. The DRM measures here, with the timed and cooperative aspect, thus become a sort of game on their own, albeit a much simpler and slightly annoying game—winning that game means you get to play the. And it is supposed to be slightly annoying, to keep it in the players mind. Forgetting about the key turns could lead to potentially disastrous results for the players, so how will they deal with this obstacle? Will one player try to play the game and turn both keys on his/her own? This will be impossible because of the key placement on both sides, but the controller or the game can’t physically stop them from trying. Will two players quickly turn the keys before the time runs out? Will those two players enlist two other friends to turn the keys for them? Either way, the keys must be turned.

Which brings up the difficulty built into this controller’s/housing’s design. Why key turns? Sparkfun.com does have a turn key sensor available, but they also have different types of buttons. Wouldn’t slapping a button be easier to operate then the action of putting an attached key into the slot and turning it? Yes, it would. Which is exactly why I’m using the key turns. Key turns can be done quickly without memorizing a code or something complicated, but they force the player to perform an action different from what’s in the game. The controller sensors and switches whose inputs are sent into the game are similar to regular controllers’ inputs: buttons, knobs, and joysticks are all available through Sparkfun and can be hooked up to the arduino, and these are more familiar to those who have played arcade games. Key turns are not, key turns require different movements the shifting a joystick or punching a button. Key turns force the player to confront the DRM system set up for this game, pull them away from the game for just an instant, and remind them “big brother controller” is monitoring their playtime. The article linked earlier mentions that a good DRM scheme is transparent, that doesn’t shove its existence in the consumer’s face. Operate in the background as much as possible, the article says. Well, this is one area of DRM that I’m purposefully ignoring, and even going towards the extreme in the opposite direction. The player will know, and if they realize this and still keep playing because the game grabs them, then this project will have succeeded.

*mention actual artistic details, large components fit in with slight annoyance/unusability while still remaining entertaining and eye grabbing

*pertinent links to sparkfun.com components mentioned would be helpful

*what has been done already and what still remains

Arcade game and housing (my project will look different, but is based on this build concept). Two players side by side, one controls the direction of movement and firing the selected weapon. The other controls the player orientation (which the movement direction is relative to) and selection of current weapon or item.

base inspiration (not the game, but the physical build)

base inspiration (not the game, but the physical build)

Game Maker tech progress

I have made nearly a dozen different small examples of how to accomplish specific things in Game Maker, things that I can easily use in my project. Small but crucial, like ammo tracking, display, and interaction; random enemy movement and spawning; and having jumps correctly interact with the environment. Jumping is still iffy, since I’m leaning toward a top down shooter style game, but it was helpful nonetheless.

More to come…

Connection established.

My arduino now connects to my game engine. That’s the short of it, but I’ve had to make some slight changes. For one, I’m using Windows 7 (on Parallels Desktop on my Mac, which works fine) and Game Maker 8.1. Game Maker Studio is the cross platform, newer version (GM9 is apparently in development for both Mac and Windows–GM8 is Windows only with no plans to develop for Mac, according to Yoyo Games), but custom DLLs, which connection requires, is still iffy in Studio. Game Maker 8.1 is perfectly fine for creating many types of games, especially arcade style, 2D games, which is exactly what my goal was and is for the project.

Now that the arduino can connect to Game Maker, my next goal is to design the basic functionality of the game in such a way as to differentiate between primary and secondary functions of the physical game stand. For instance, the game stand should have at least movement options, and probably interaction options. I’m envisioning a simply designed game, movement (4 or 8 directions), shooting approaching enemies, picking up health. Game Maker can make these types of games well, and indeed there are already tutorials up for these sorts of things. Those are the primary game stand functions (I’m still drawing up my plan for this Thursday, but the project is shaping up to look like an arcade stand), but the secondary functions are what will make this project more than just an arcade game stand.

I will use number pads and LED 4×4 light matrix buttons for directed input, but the direction will now also be an integral part of the project, because the announcer for the game will have a personality beyond “you’ve reached this point where you must input such and such a code to continue playing.” The announcer will comment on the player’s progress, or lack of it, the proper way to play the game. If the player does poorly, the announcer will sarcastically comment on the player’s performance. If the player does well, the announcer will grudgingly acknowledge the player managed to do something right. With some arrogance and naivety permeating the comments for comedic relief. I’m going for a passive aggressive, caustic personality guiding the player through playing the game. In a way, this will give a voice to the attitude built into the game stand and the project. The project comments on the bad part of relations between game designers and players. Games can be pirated, so game designers are forced to build safeguards into their games to prevent piracy. In the process though, this can frustrate honest gamers with extra processes or hiccups in game performance if the game thinks that a situation could potentially be used to pirate the game, even if the game is wrong. Some games need an internet connection constantly for example, so a main server can keep checking that the game is authentic. No connection, the game won’t play, even if the internet is just on the fritz, as opposed to turning the internet off to more easily pirate a game. Also, possibly, I might include a small display screen (possible example as <https://www.sparkfun.com/products/8799&gt; or <https://www.sparkfun.com/products/8335&gt;) for an extra display of game mood, to really bring it over the top.